The Ambire Guide to Arbitrum Odyssey: Event Start & Bridge Week
Ambire provides a comprehensive guide to the Arbitrum Odyssey event, focusing on Bridge Week.


A cryptouser’s handbook for exploring the Arbitrum ecosystem and winning exclusive NFTs
Hi there, Ambire army 👋
We’re back with news from the Arbi-verse, where the Odyssey is just about to start. As promised, we’re going to guide you step by step through this journey, helping you win some exclusive NFTs while discovering one of the hottest L2 chains around.
Scroll down for the full story 👇
Arbitrum Odyssey Begins
As already announced in our intro blogpost from this series, the Arbitrum Odyssey is an online crypto-event where users can explore the L2 network (and its projects) while winning exclusive NFTs, created especially for this experience.
The Arbitrum team announced late last week the Odyssey is officially beginning today, June 21st, at 1 PM EST.
The event starts off with Bridge Week, where you’re invited to join (or reaffirm your pledge to) the Arbi-verse by moving ETH into the Arbitrum network. This must be done through one of the bridges or exchanges selected for the event, and this action will automatically qualify you for claiming an NFT, at the end of the week.
How to participate in Bridge Week
There are 19 projects that can be used in Bridge Week, as per organizers’ announcement:
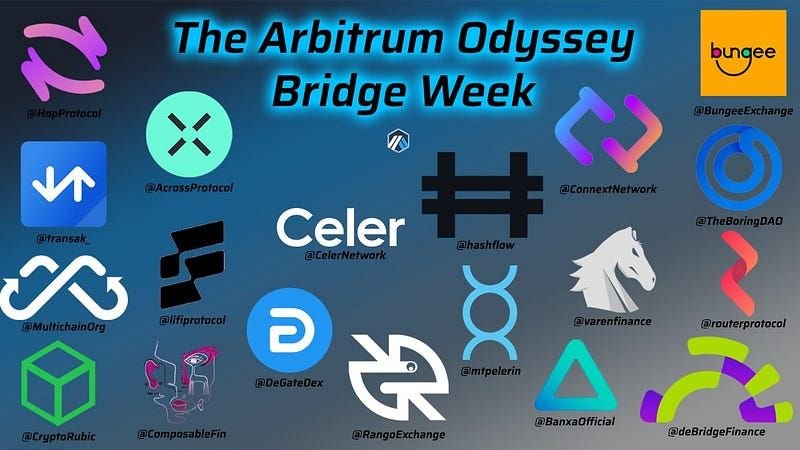
As the Arbitrum team has stated in its Discord FAQs, there is no minimum deposit of ETH necessary to qualify you for the Bridge Week NFTs. You should just transfer however much ETH you like or need, but be sure to do it by June 27th, 12:59pm EST, using one of the 19 approved protocols for the transaction (see image above).
To bridge ETH to Arbitrum from Ambire Wallet through one of these protocols, all you have to do is complete a few simple steps. We’ve even prepared a tutorial, making sure it’s easy-peasy-nice-n-breezy for you to take part in Odyssey’s Bridge Week: you can check it out at the end of this article 👇👇
What about special NFTs?
As a bonus for participating in the first week, those of you who end up using the bridge that had the most wallets bridging into Arbitrum during Bridge Week will receive a bonus NFT. There’s no real way of knowing which protocol will be the winner, so fingers crossed you get the right one 🤞 🤞
However, if you really-really-really want to get that extra NFT and you have the time and availability, you can just use all 19 bridges and exchanges to move some ETH into Arbitrum. This way you make sure you will receive the special bonus NFT regardless of which bridge will be the most popular in the end. It isn’t a hack, more of a fail-proof strategy: it will require you to agree to more costs and resources spent as you make transactions on all 19 platforms, but it should also deliver the coveted collectible.
Bridging done, what’s next?
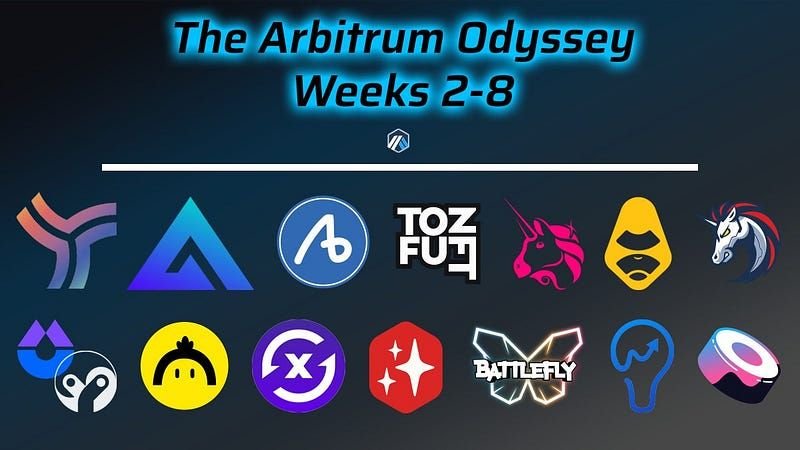
In other news, Arbitrum has announced that instead of Hashflow Protocol being one of the projects in the following weeks, it has been moved to Bridge Week. So its place has been taken by runner-up GMX in the timeline, with the calendar and updated list of projects to interact with reading so:
Week 1: Bridge Week
Week 2: Yield Protocol and GMX
Week 3: Aboard Exchange and TofuNFT
Week 4: Uniswap and Apex
Week 5: 1inch and Izumi/Yin Finance
Week 6: Dodo and Swapr
Week 7: TreasureDAO and Battlefly
Week 8: Ideamarket and Sushi
That’s all for today, but we’ll keep our eyes and ears on Arbitrum, ensuring you’re in the loop as the event unfolds. In the meantime, make sure you go through our tutorial below and qualify for Bridge Week.
In a few days we’ll also have a breakdown of the tasks and rules of engagement for Week 2 of Arbitrum Odyssey, so stay close and make sure you collect the first two NFTs in play.
’Til next time, remember to keep the flame on 🔥🔥🔥
The Ambire Guide to Arbitrum Odyssey: Bridge Week Tutorial
To participate in Arbitrum Odyssey Bridge Week, make sure you connect your Ambire account to a bridge or exchange of your choice from the 19 eligible for the event:
Hop Protoco
Across Protocol
Transak
MultiChain
Rubik
LiFi Protocol
Bungee Exchange
Connext
Celer Network
Composable Finance
DeGate
Rango Exchange
Hashflow
Mt. Pelerin
Varen Finance
BoringDAO
Router Protocol
Banxa
deBridge Finance
From the exchange or bridge platform you chose, connect your Ambire Wallet via WalletConnect:
Please note we created this tutorial using Across Bridge as a random choice, you’re free to use whichever protocol you prefer from the 19 eligible ones.
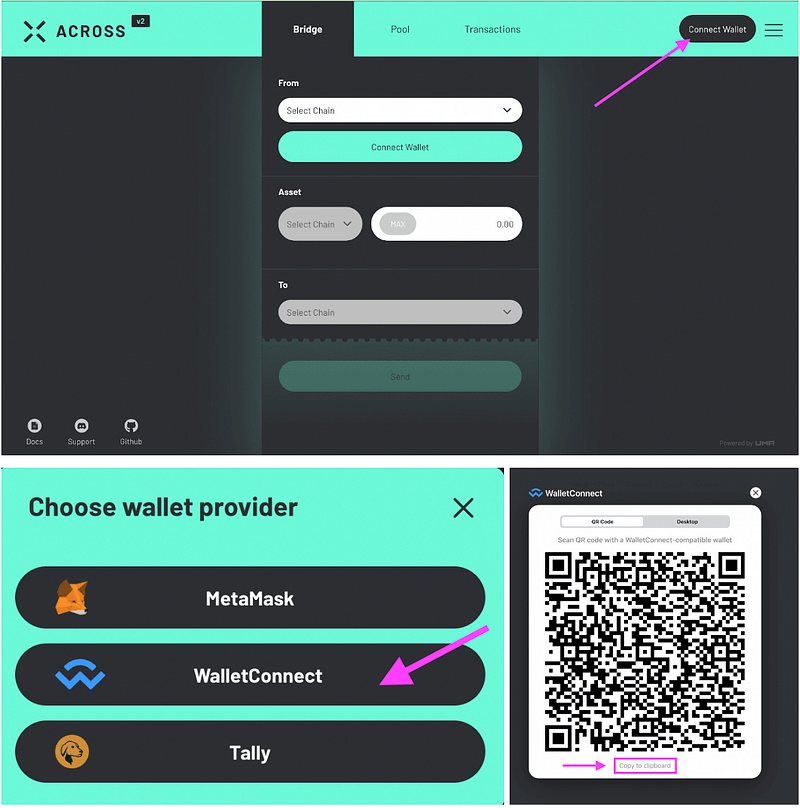
Keep in mind that once enabled in the bridge or exchange, WalletConnect will automatically connect to Ambire when you copy the project’s address to your clipboard (except if you use a Firefox browser, then you have to also connect manually from the dApps button on your dashboard):
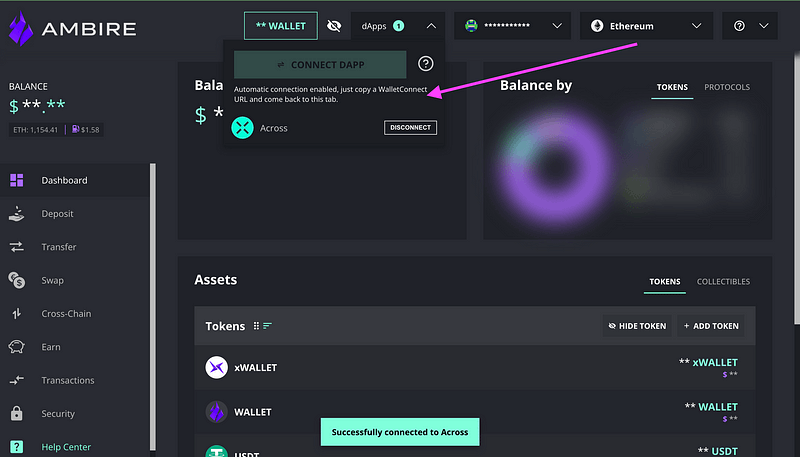
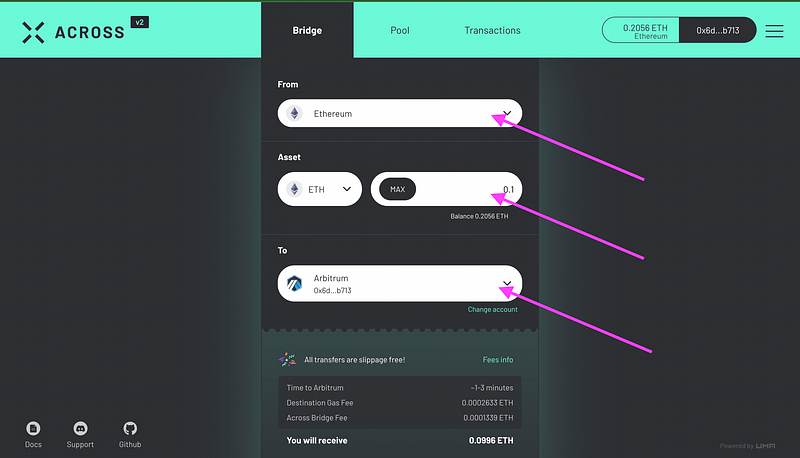
Next, go back to the bridge or exchange and insert the details of your transaction:
— select the network you want to move funds from
— input the sum you wish to transfer and double-check you selected the ETH coin
— make sure you select Arbitrum as destination network
After you verify the transaction details and double-check the numbers, you can send the transaction order from the bridge or exchange and go back to Ambire Wallet to sign it:
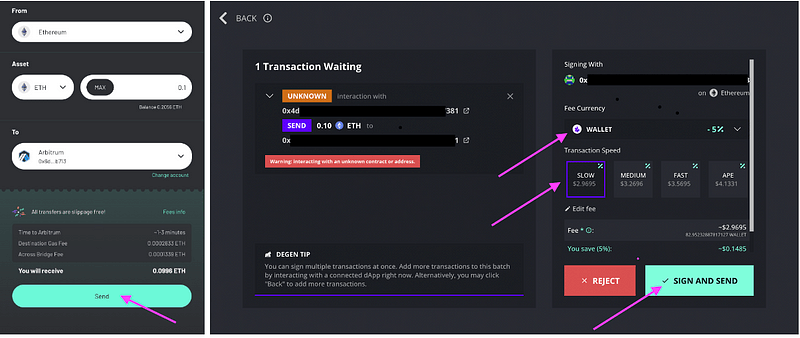
Remember to double-check addresses and make use of the multiple user features that Ambire offers for transactions: select the token you want to pay the transaction fees in (you can opt for stablecoins, ERC-20 tokens, or the native $WALLET token, which will give you a fee discount), as well as the speed of the transaction itself.
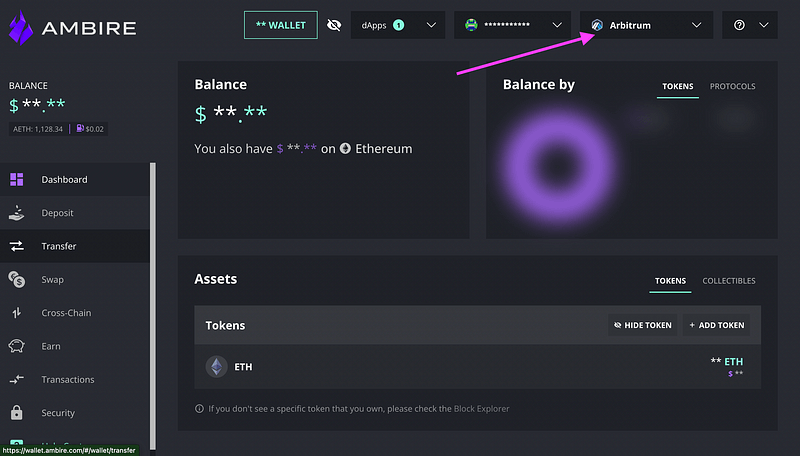
That’s all there is to it, your transaction should now be visible and verifiable in the Transactions tab of your Ambire Wallet account, on the bridge or exchange where you made the cross-chain operation, as well as on Etherscan. You should also be able to see the ETH you sent in your Ambire account, when choosing Arbitrum as a network:
Be sure to make your ETH transfer for Bridge Week between June 21st and June 27th, 12:59pm EST, so that it is counted as your participation in the first stage of Arbitrum Odyssey.
We hope our tutorial helped you navigate Bridge Week with ease. If you have any questions or need extra help, please contact our Support or give us a shout on Discord — we’ll be happy to lend a hand and solve any issue or uncertainty you might encounter.
Interested in Ambire? Follow us:
Discord | X (Twitter) | Reddit | GitHub | Telegram | Facebook